
Recipe Highlights
My family eats salmon at least once a week, and this is one of my most-used kitchen techniques. Once you learn it, you’ll always have authentic Japanese-style salmon fillets on hand—no specialty store needed.
- Authentic cut, easy technique – A 30-degree diagonal slice maximizes surface area for faster, more even cooking
- Budget-friendly – Costs significantly less than pre-cut Japanese-style fillets
- Perfect portion control – The traditional Japanese fillet size is about 2–3 oz, perfect for even cooking and easy plating
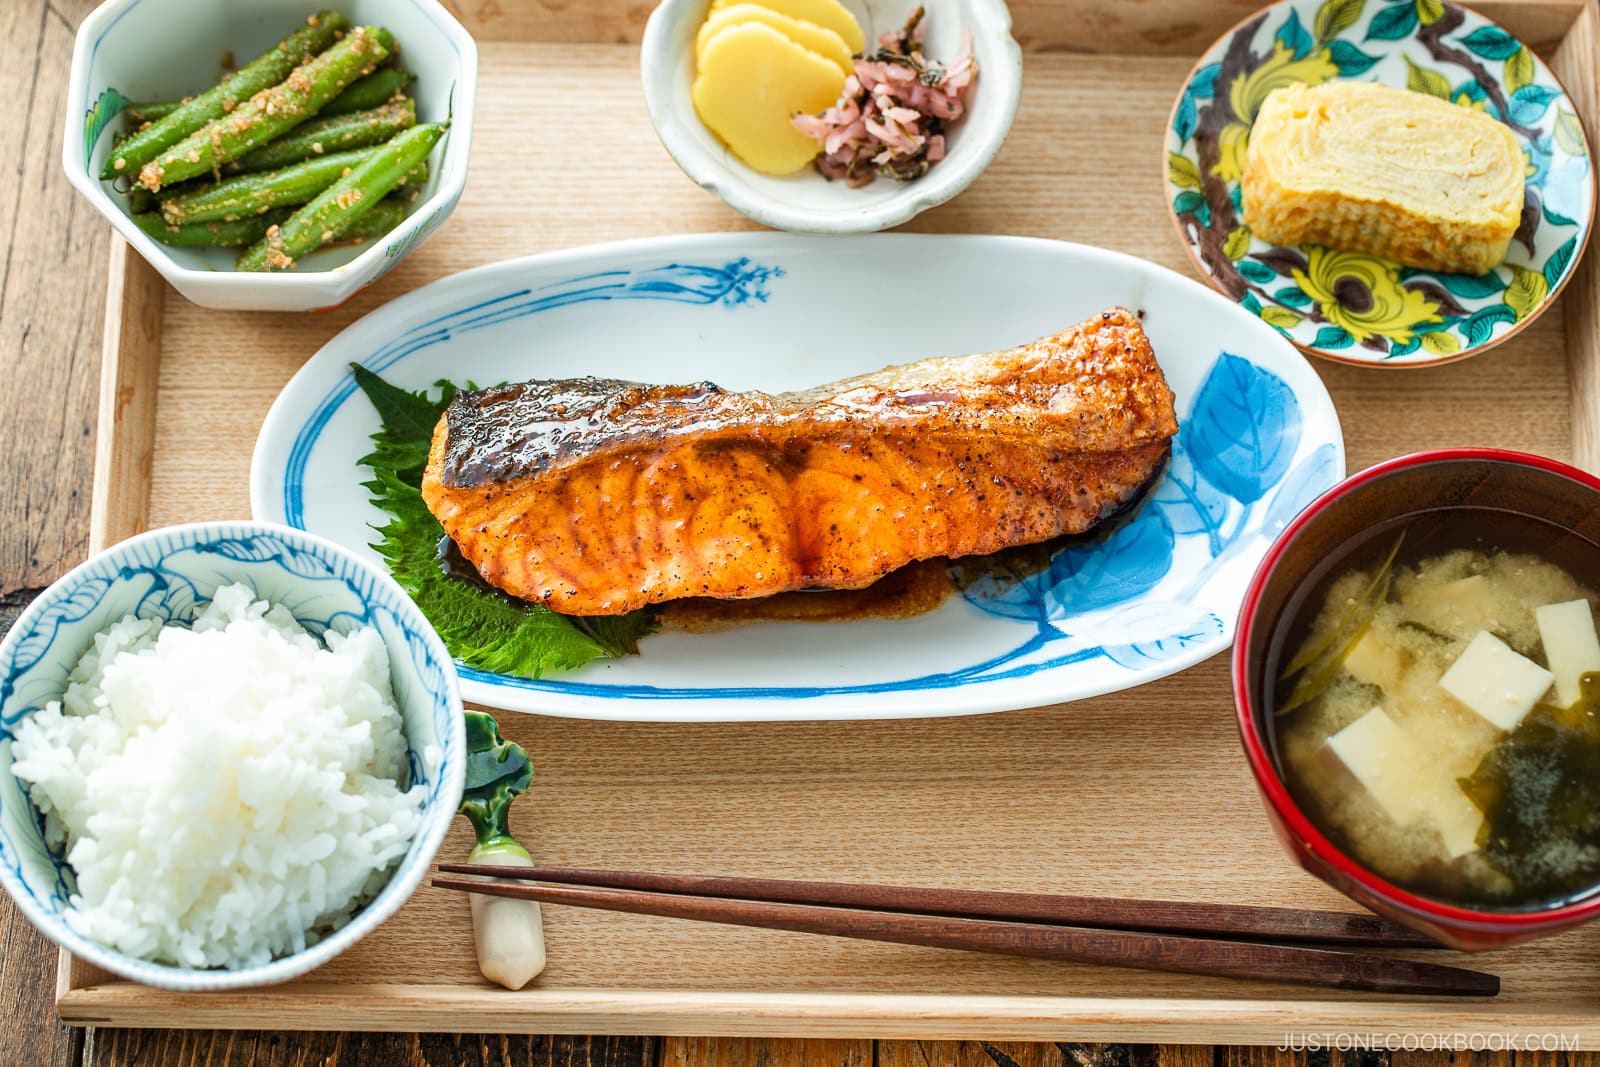
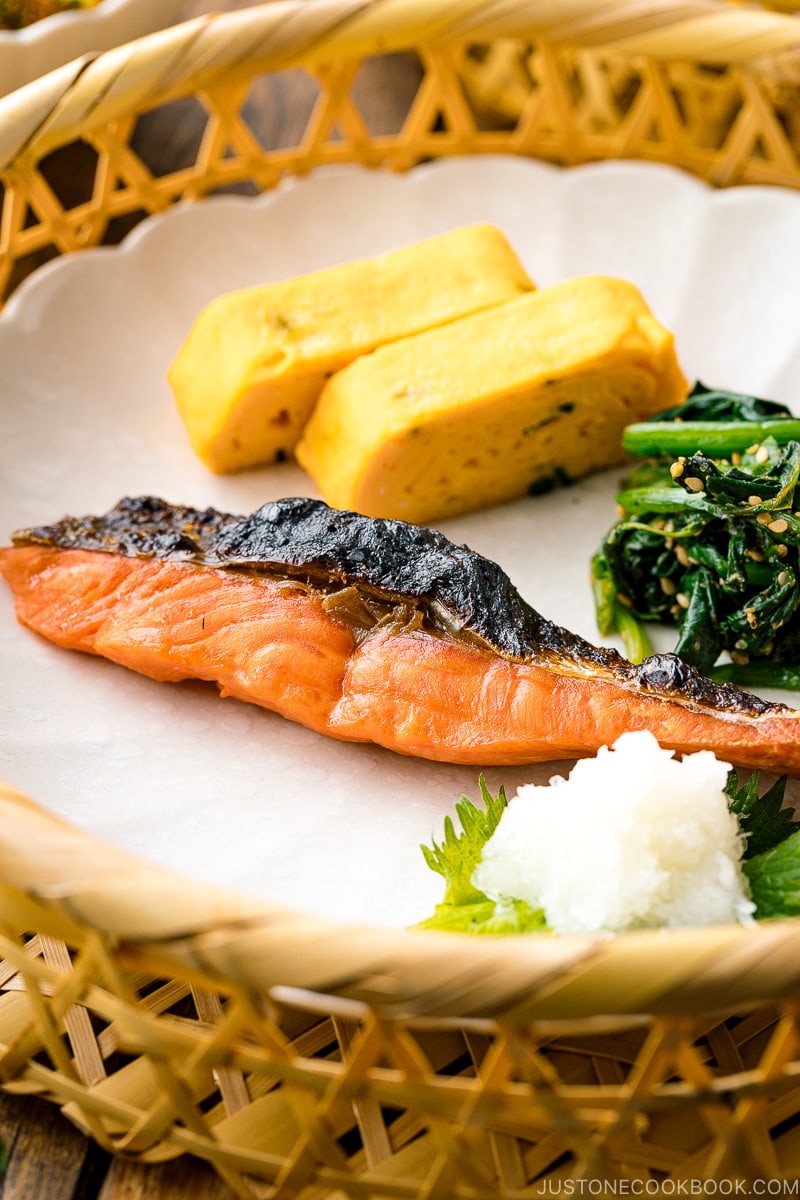
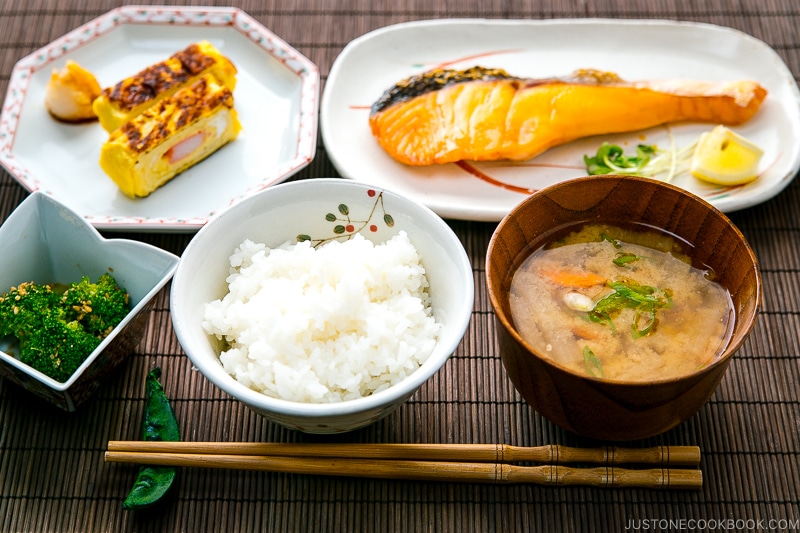
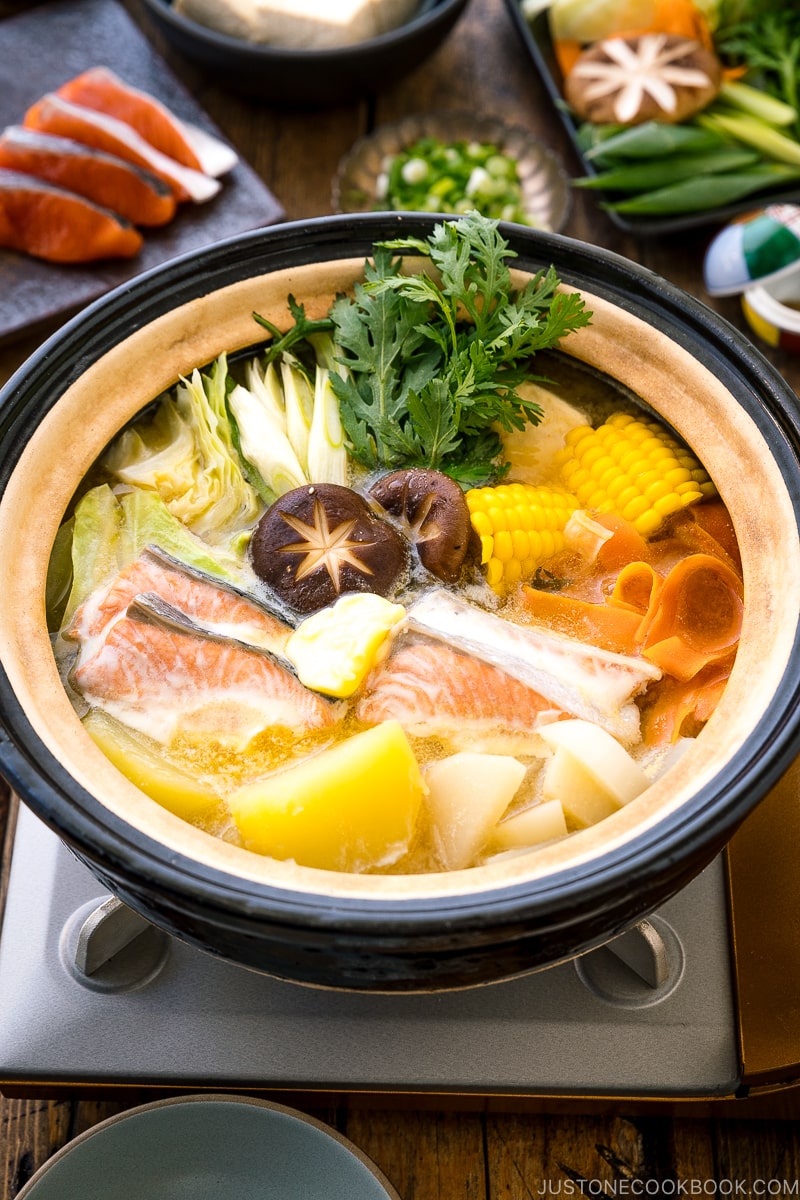
In this tutorial, you’ll learn exactly how to break down a side of salmon into authentic Japanese-style fillets—ready for Teriyaki Salmon, Hokkaido Salmon Hot Pot, or popular Japanese breakfast champion, Salted Salmon recipe next!
What Kind of Salmon to Use
There are several kinds of salmon and each comes in different thicknesses, flavors and textures:
- King Salmon (Chinook) – Richest flavor, highest fat content; the most luxurious choice
- Coho Salmon – Milder flavor, medium fat; a versatile everyday option
- Sockeye Salmon – Deep red flesh, bold flavor, leaner than king; ideal for Japanese-style fillets
- Atlantic Salmon – Mild, widely available, and consistently fatty; the easiest to find year-round
- Arctic Char – Similar to salmon in texture, slightly milder; a good substitute when salmon is unavailable
Any of these works for Japanese-style fillets, though sockeye and king salmon are the most common choices at Japanese grocery stores.
For today’s tutorial, I bought a side of wild sockeye salmon (1.3 lb, 600 g) from Costco.
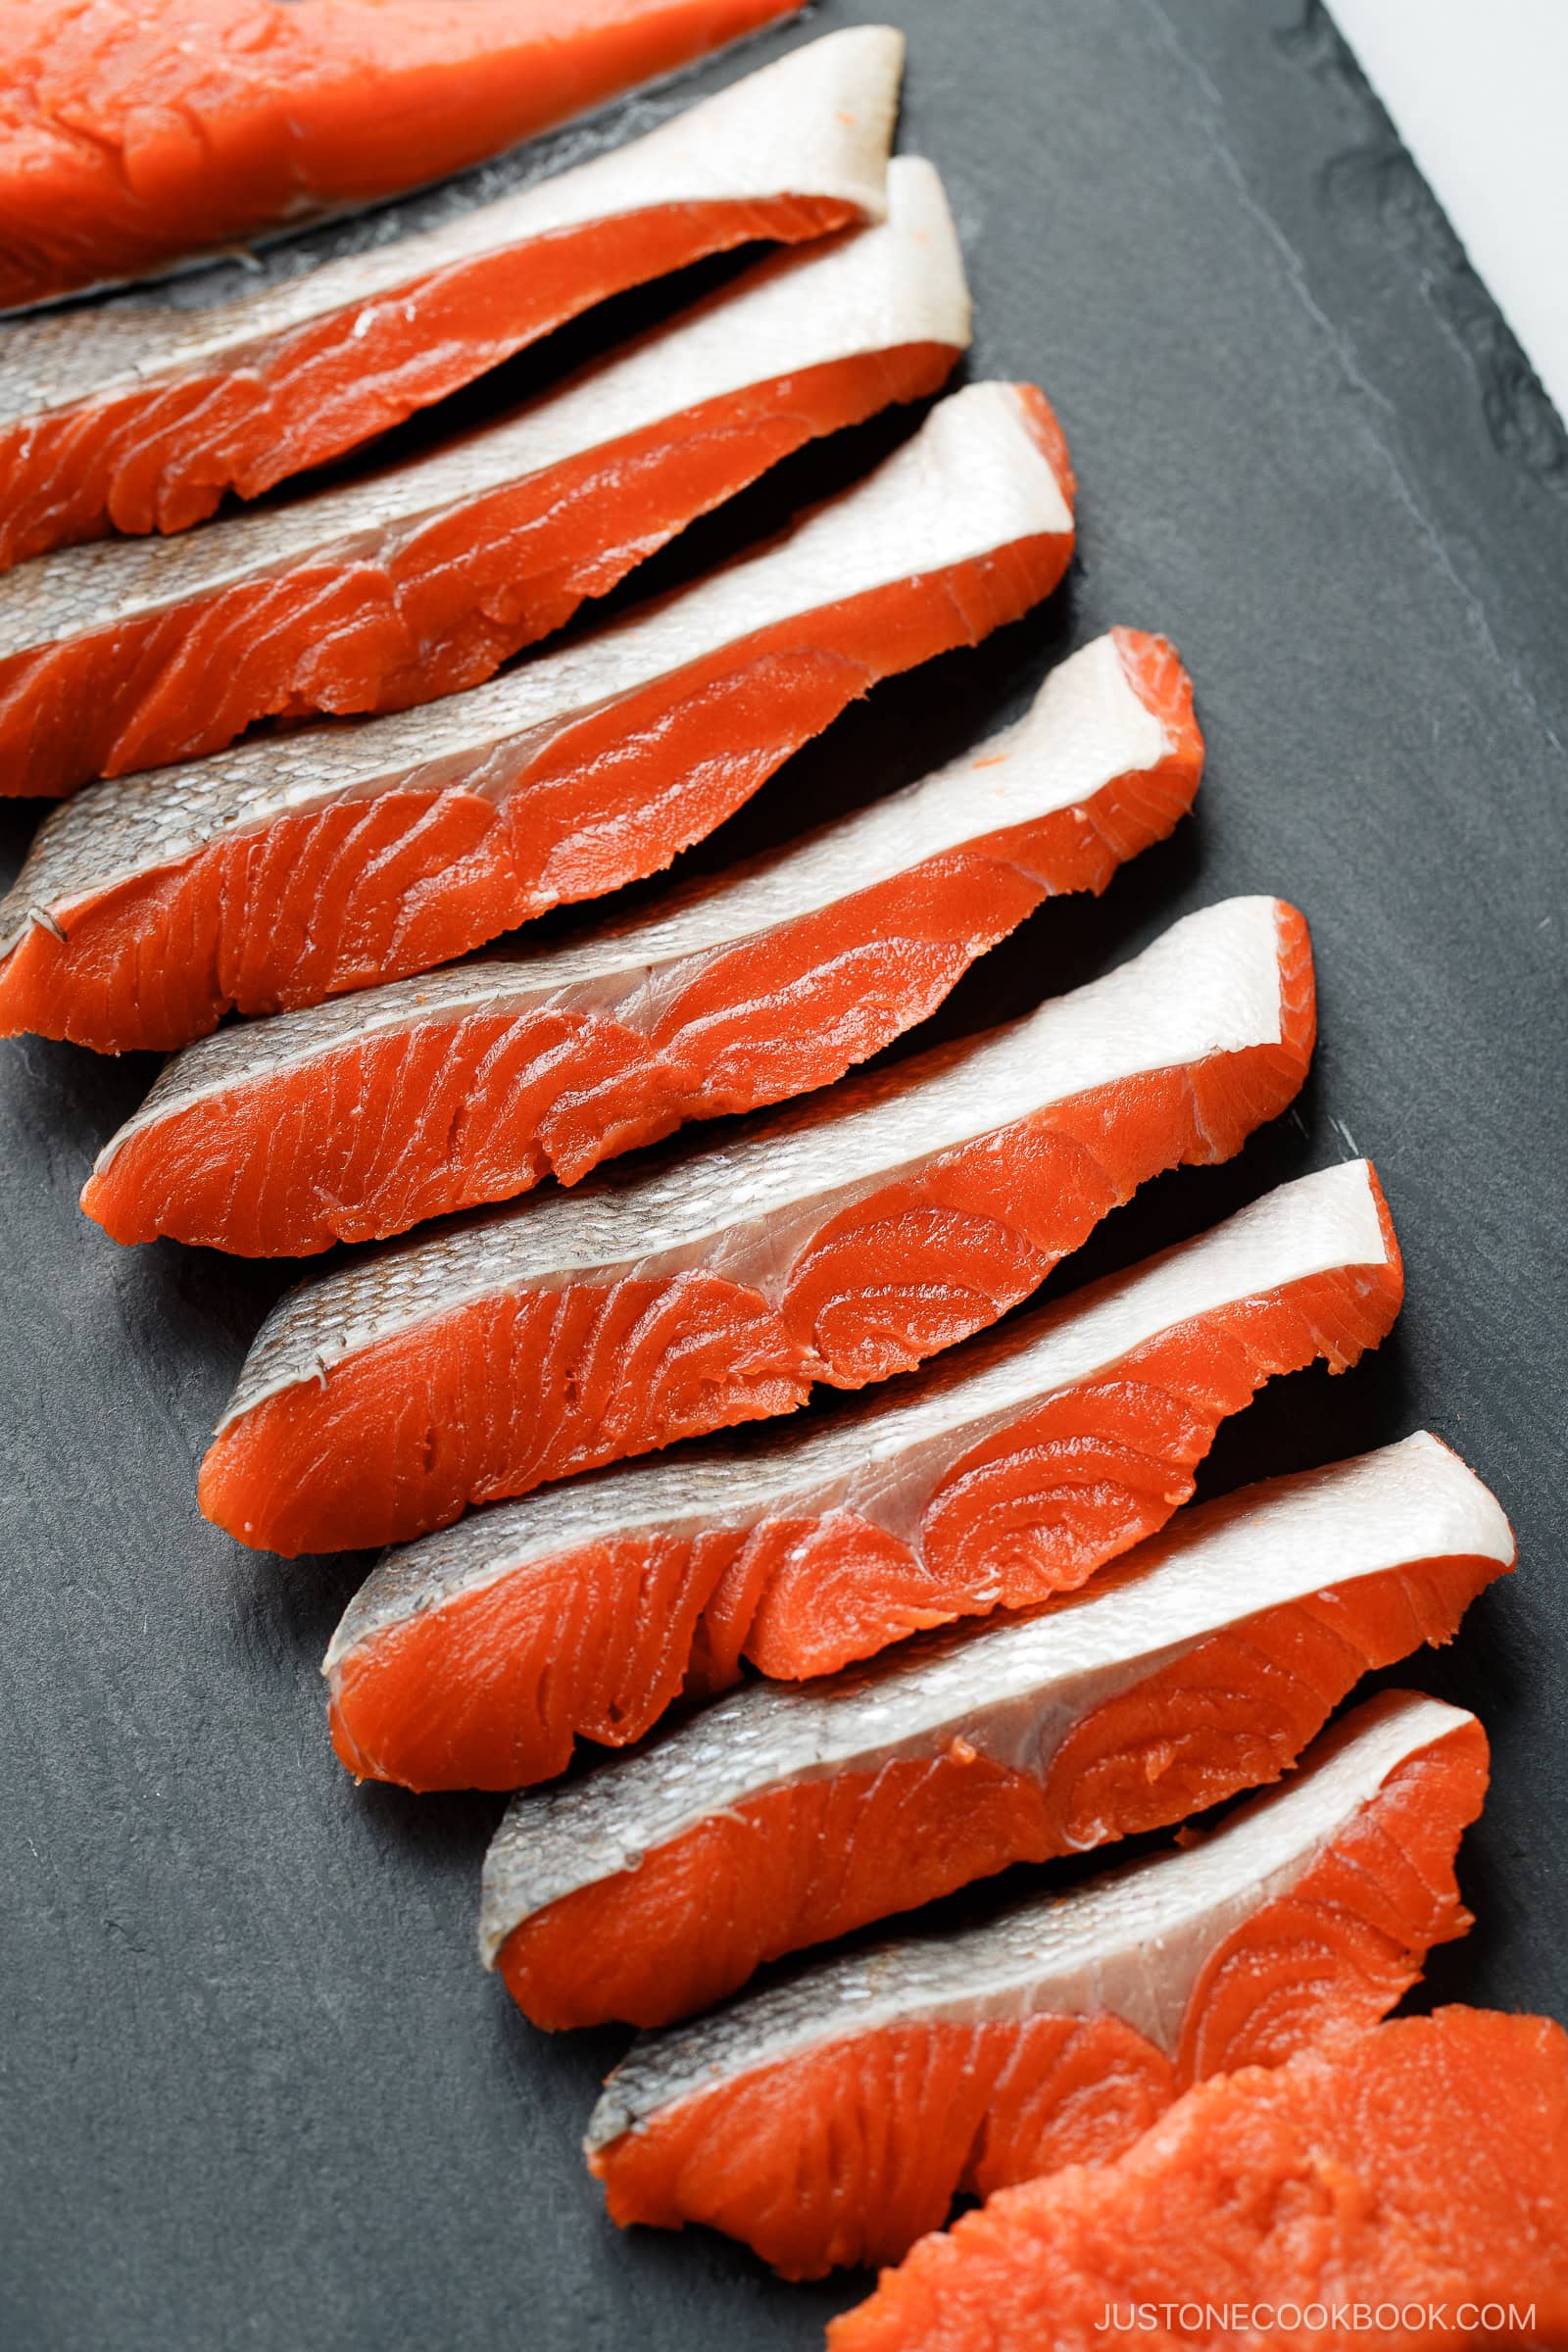
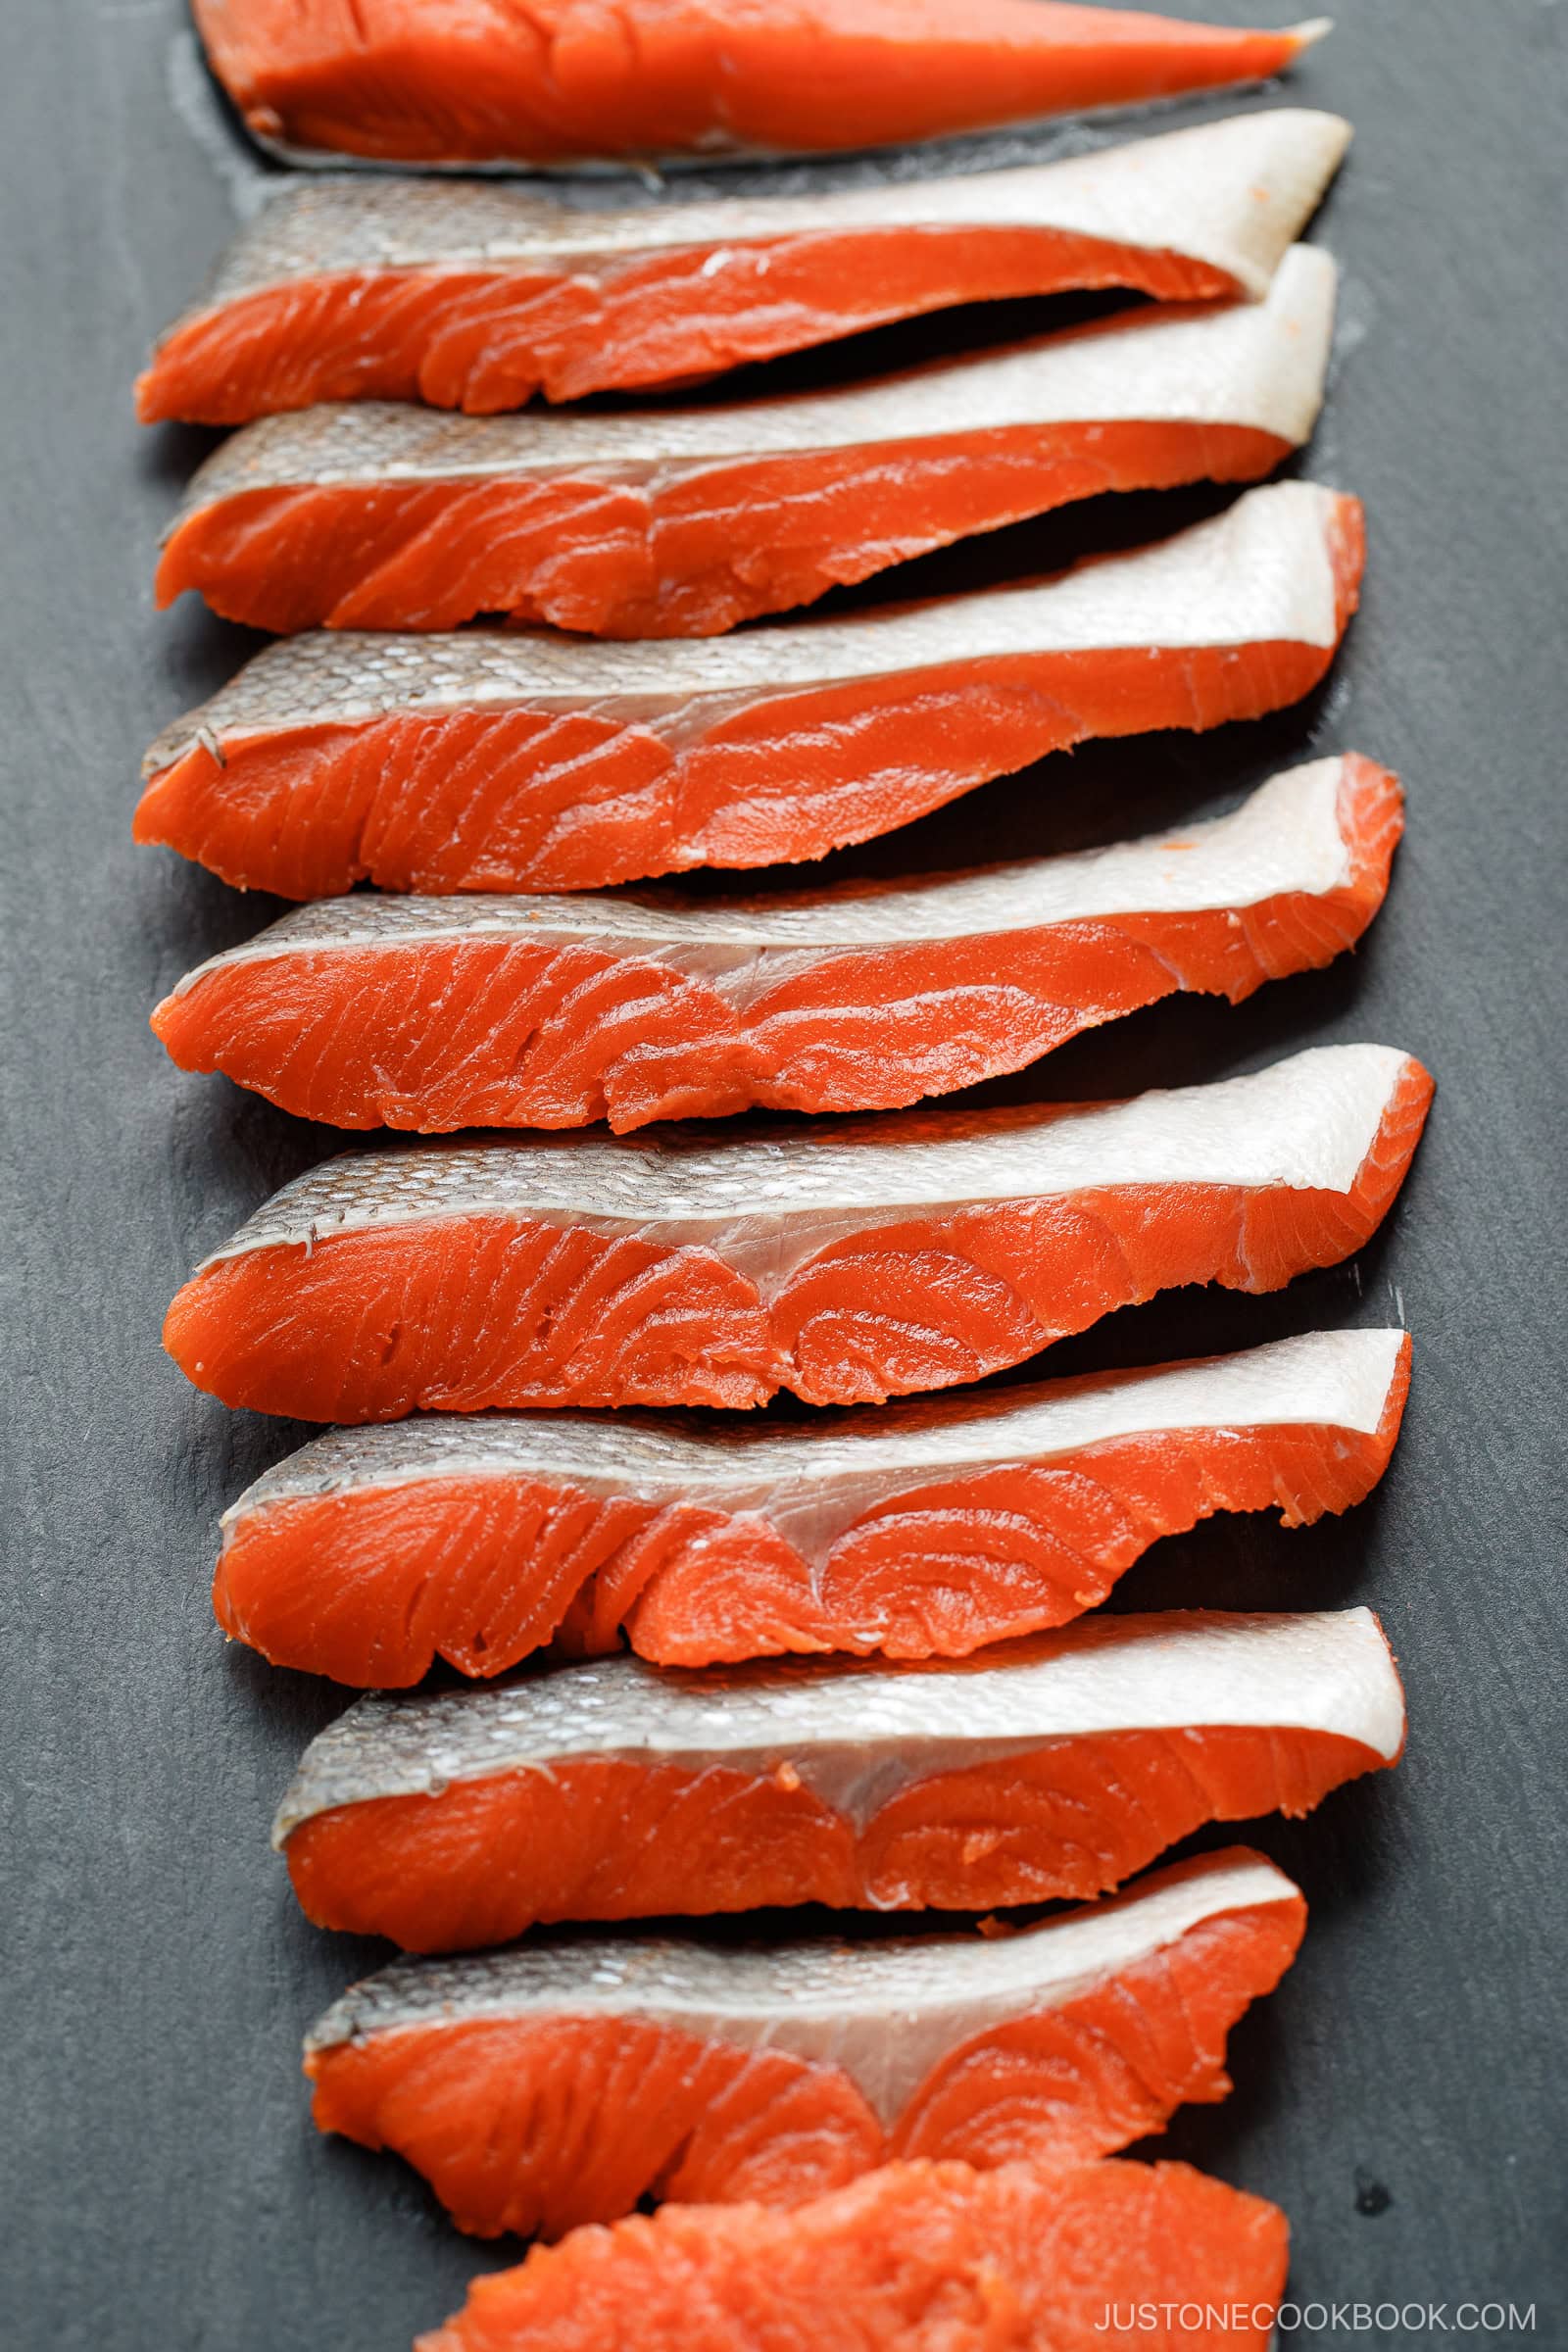
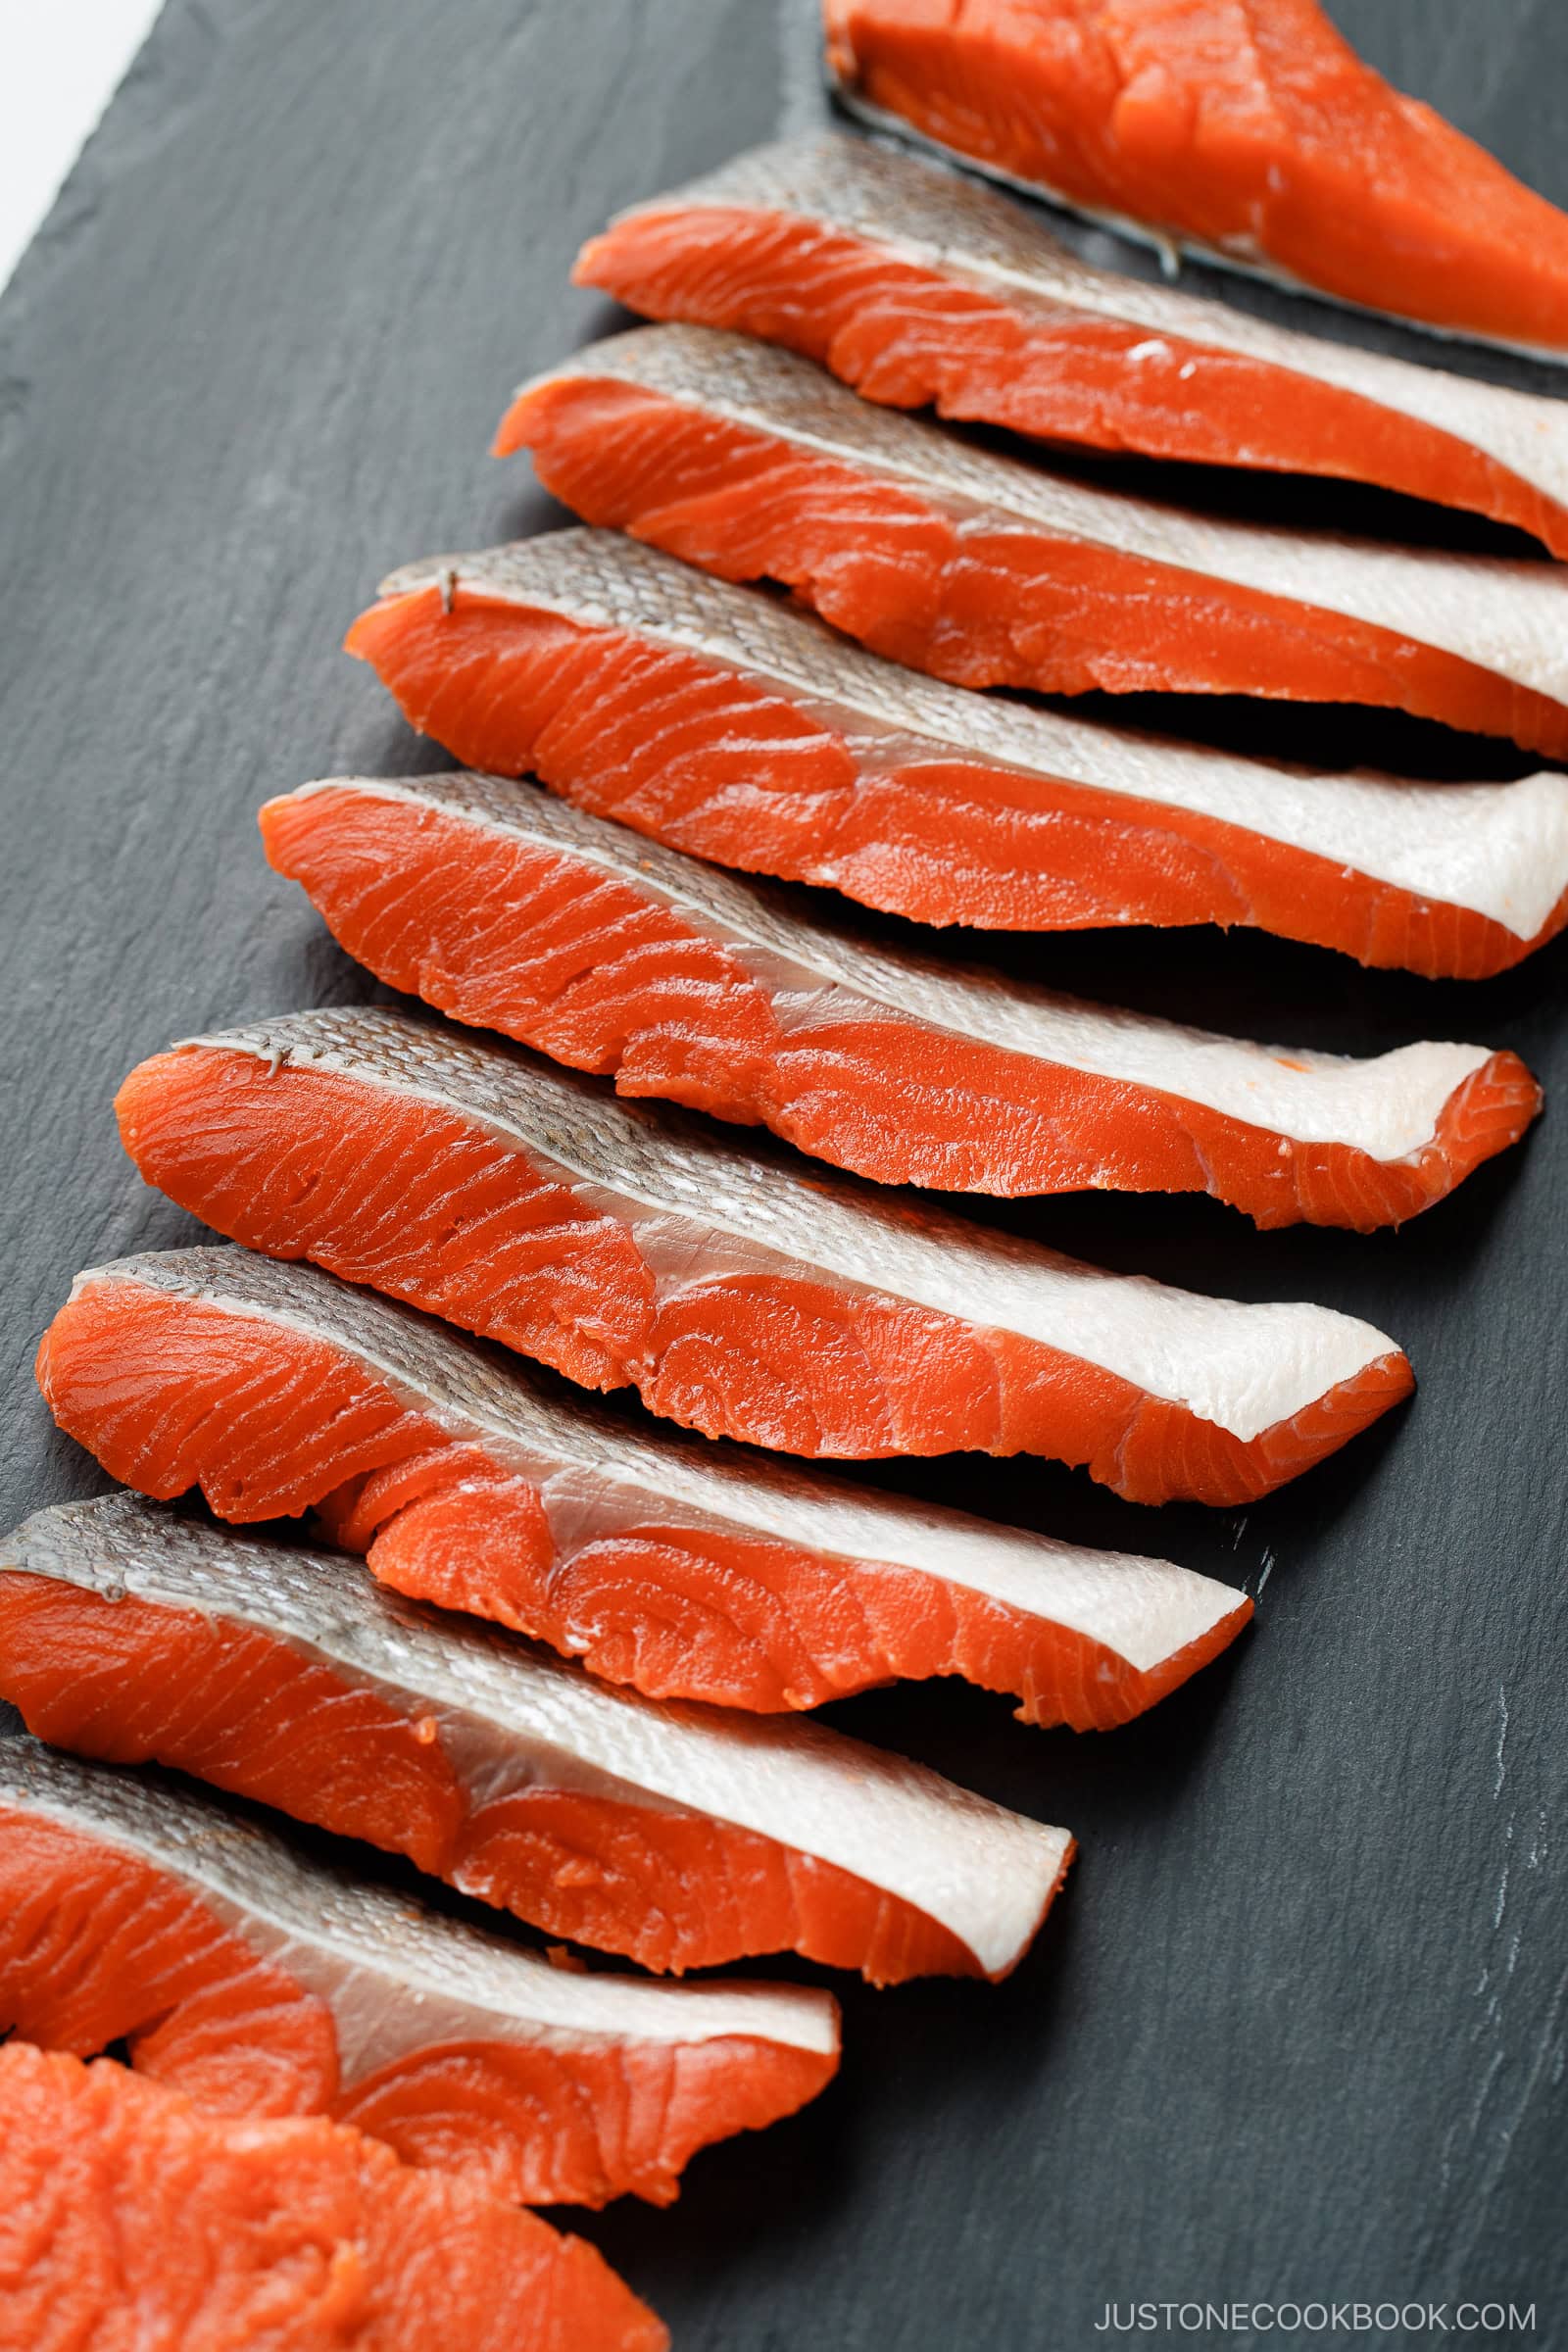
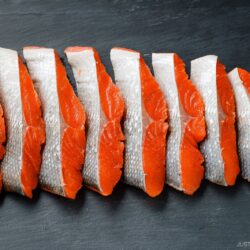
How to Cut Japanese-Style Salmon Fillets
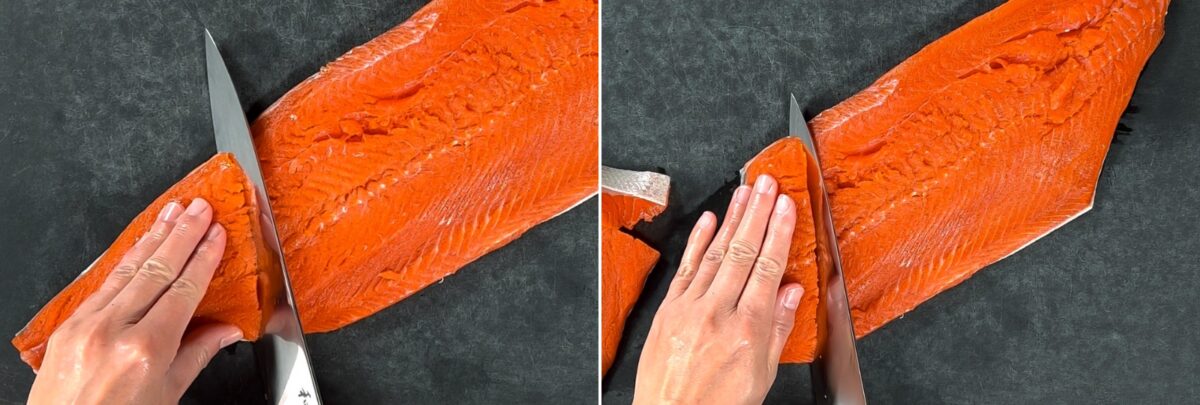
- Prepare your salmon. Place the side of salmon skin side down on a clean cutting board, narrow tail end to your left. Check that the salmon skin does not have scales.
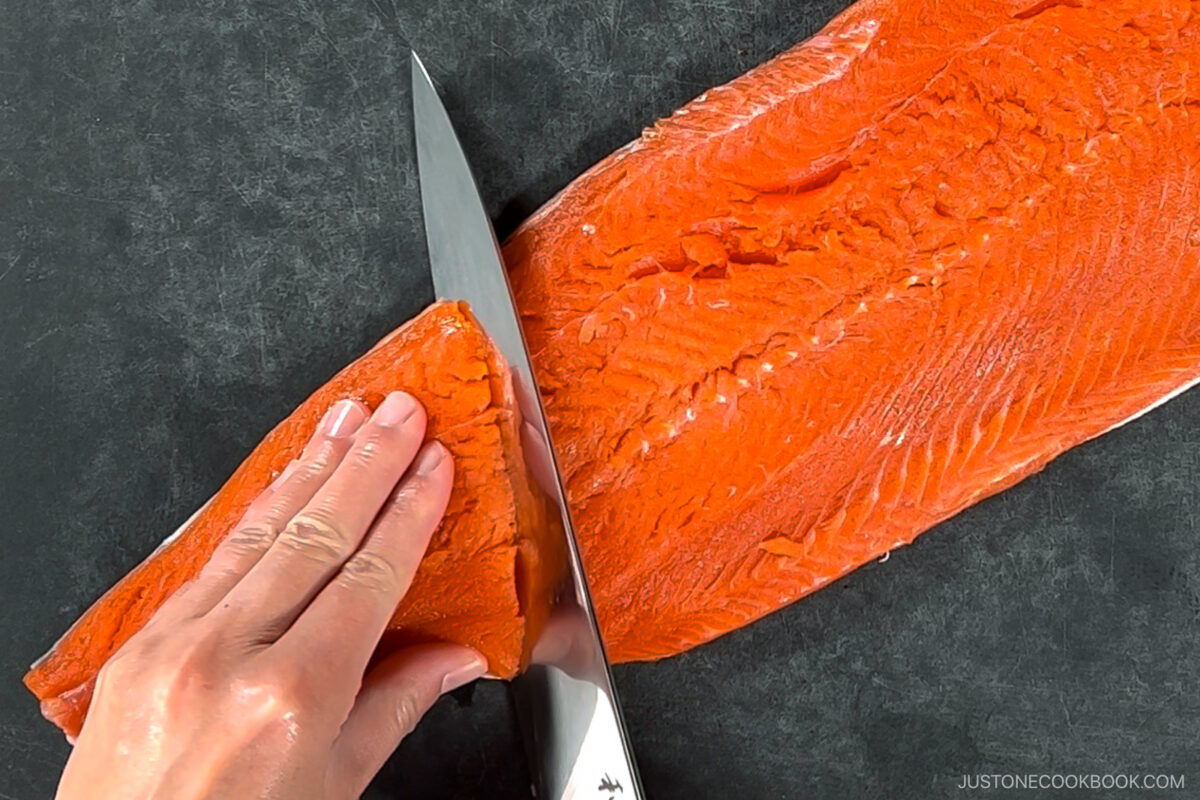
- Trim the tail. Remove the very tip of the tail end. It’s too thin to make a proper fillet and will overcook.
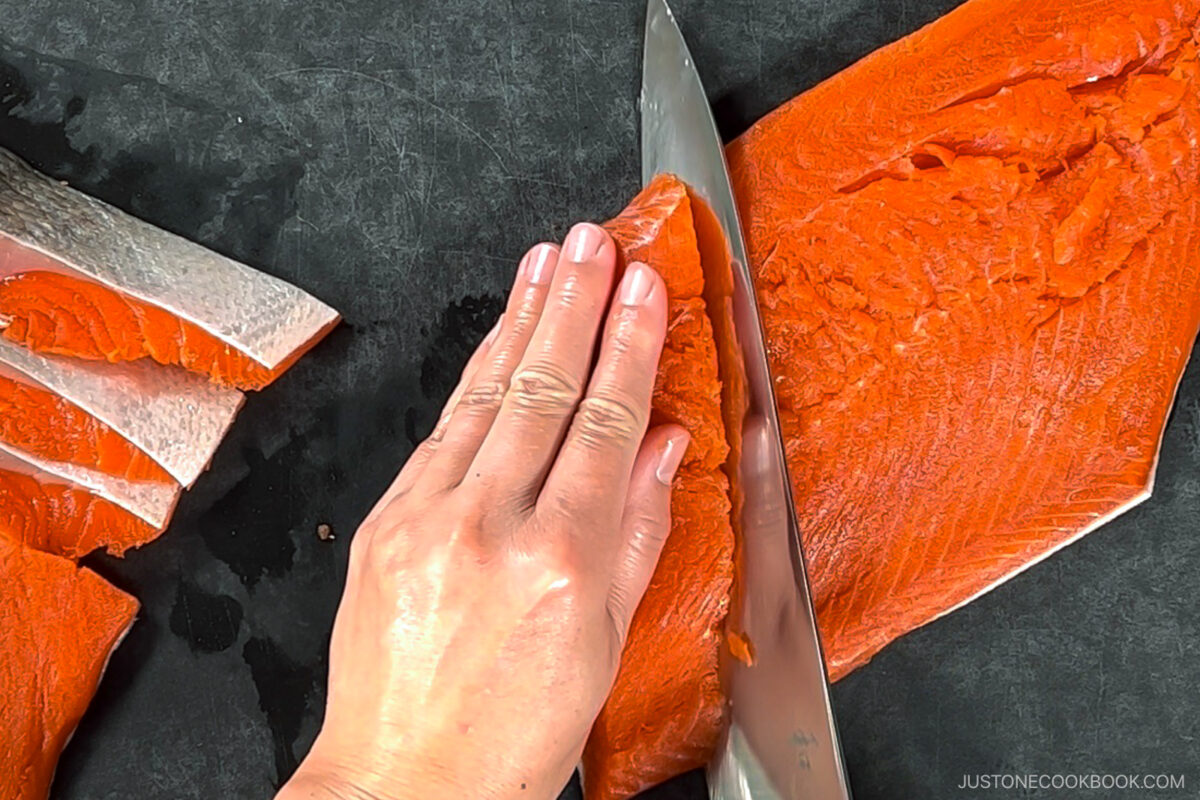
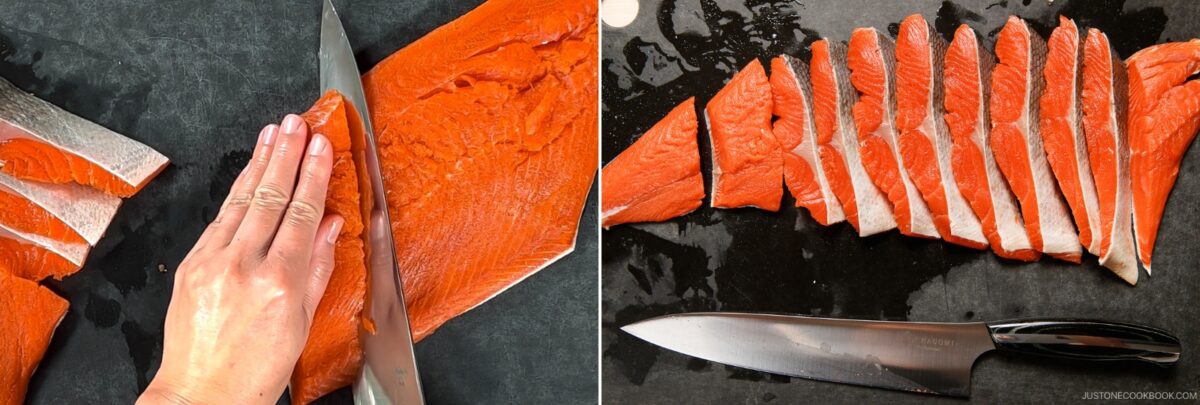
- Slice the fillets. Tilt your knife back at a 30-degree and slice toward the tail. This diagonal position is what gives Japanese-style fillets their signature wide, flat shape. Each fillet should be 1 inch (2.5 cm) thick and weigh 60–80 grams (2.1–2.8 oz).

Nami’s Recipe Tips
These simple tips will help you cut Japanese-style salmon fillets perfectly every time.
- Use a sharp knife – A long thin blade gives you clean cuts with minimal pressure. Avoid serrated knives, which tear flesh and ragged edges.
- Choose the left side fillet if possible – A side of salmon comes in left and right sides. Since you’re buying a whole side, I recommend the left side — when plating, the dark skin naturally falls on the left and the lighter belly skin on the right (see below). It’s helpful to remember that the belly side has less flesh since the gut has been removed.
- Don’t skip trimming the tail – Even a small uneven tip will overcook before the rest of the fillet is done.
- Weigh your fillets – 60–80 grams (2.1–2.8 oz) is the traditional Japanese portion. Much smaller than a typical Western portion.
- Keep the skin on – It protects the flesh during cooking and crisp up beautifully in a hot pan.
Storage Tips
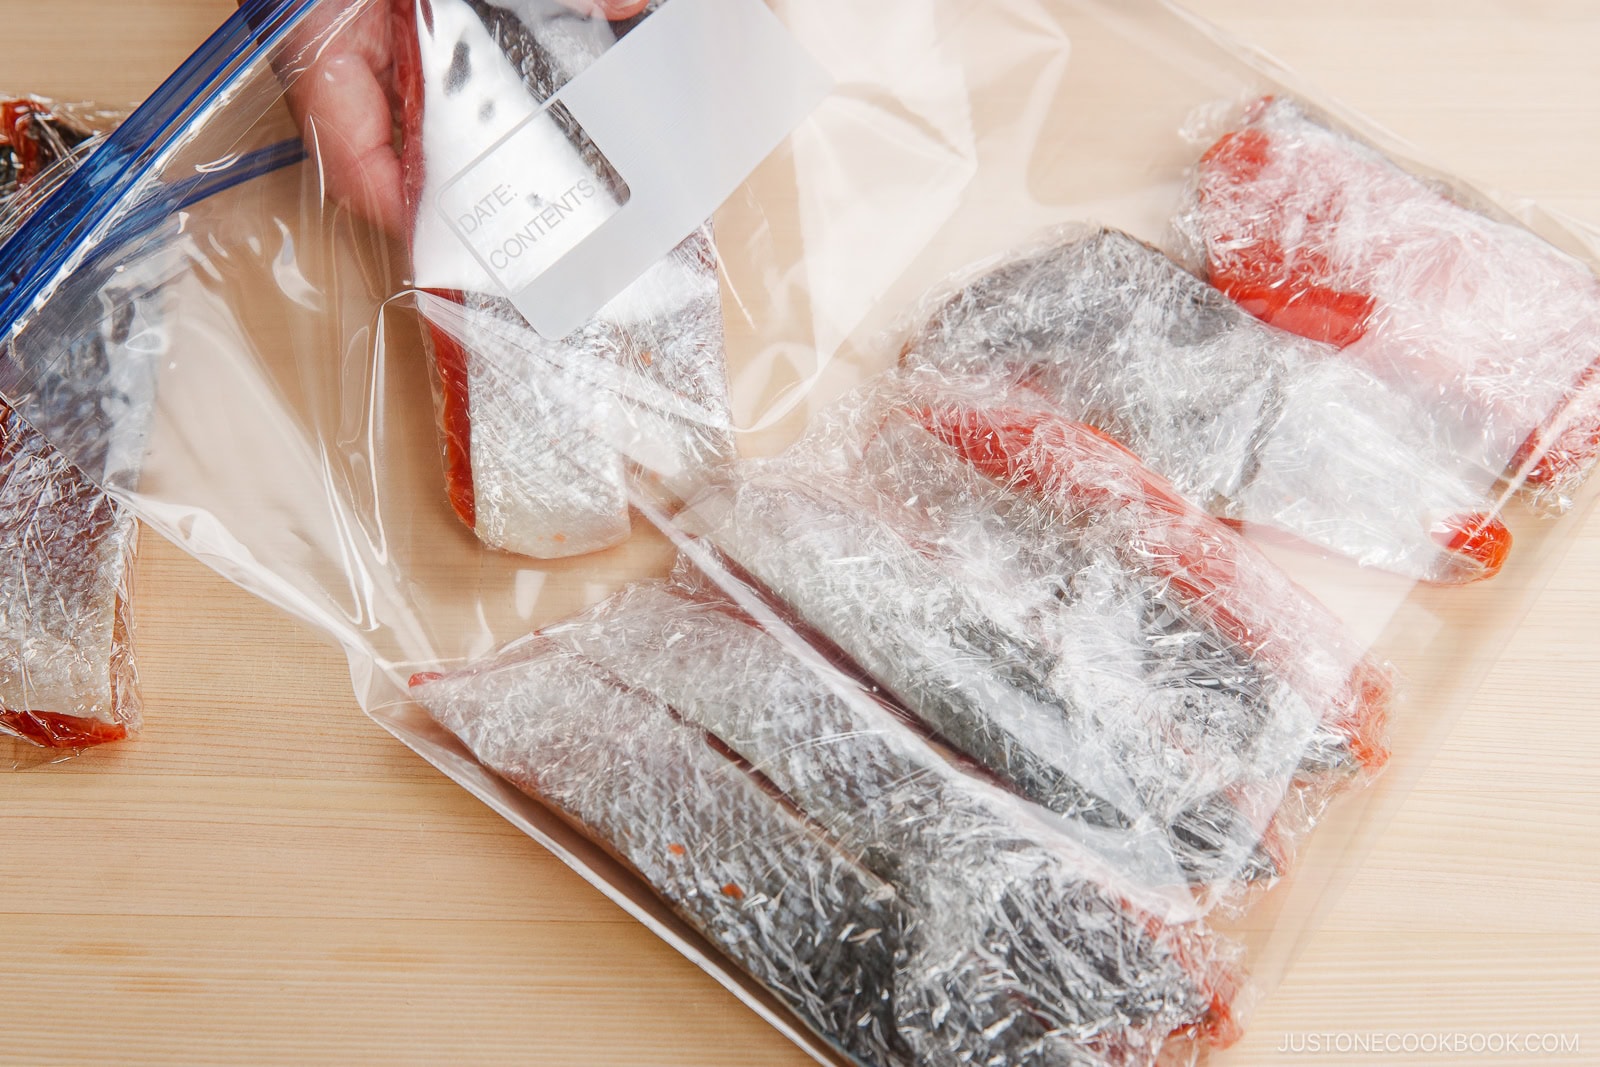
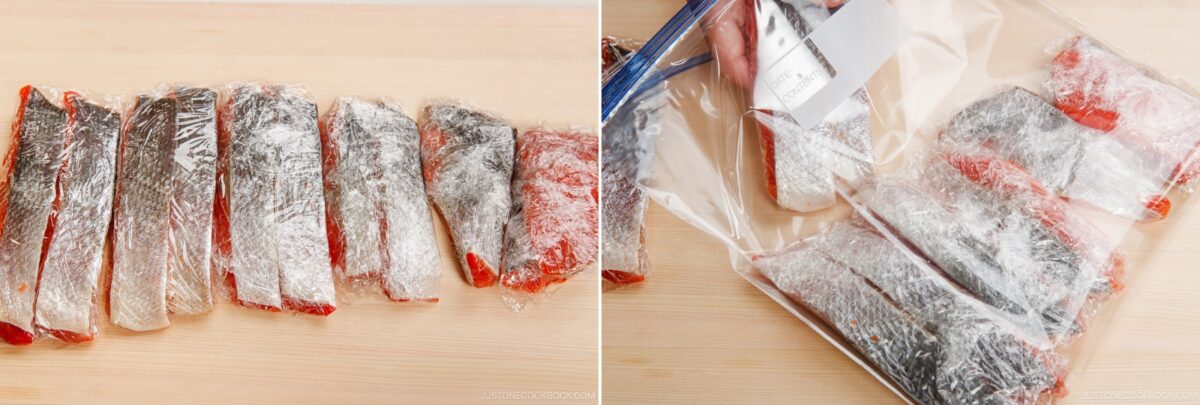
To Store: I am not a big fan of plastic usage; however, to preserve the salmon and its fresh quality for a longer time, you would need to tightly wrap each fillet in plastic, remove the air, and put it in the bag/container before storing in the freezer. It will last for a month, or a bit longer in a well-maintained freezer.
I’d love to hear how yours turned out! 💛 Please leave a star rating and comment below to share your experience. Your feedback not only supports Just One Cookbook but also helps other home cooks discover recipes they can trust.
How to Cut Salmon into Japanese-Style Fillets
Ingredients
- 1 side of salmon (1.3 lb, 600 g; you can use any type of salmon; I used the left side of wild sockeye salmon from Costco; read the blog post for why I used the left side)
Instructions
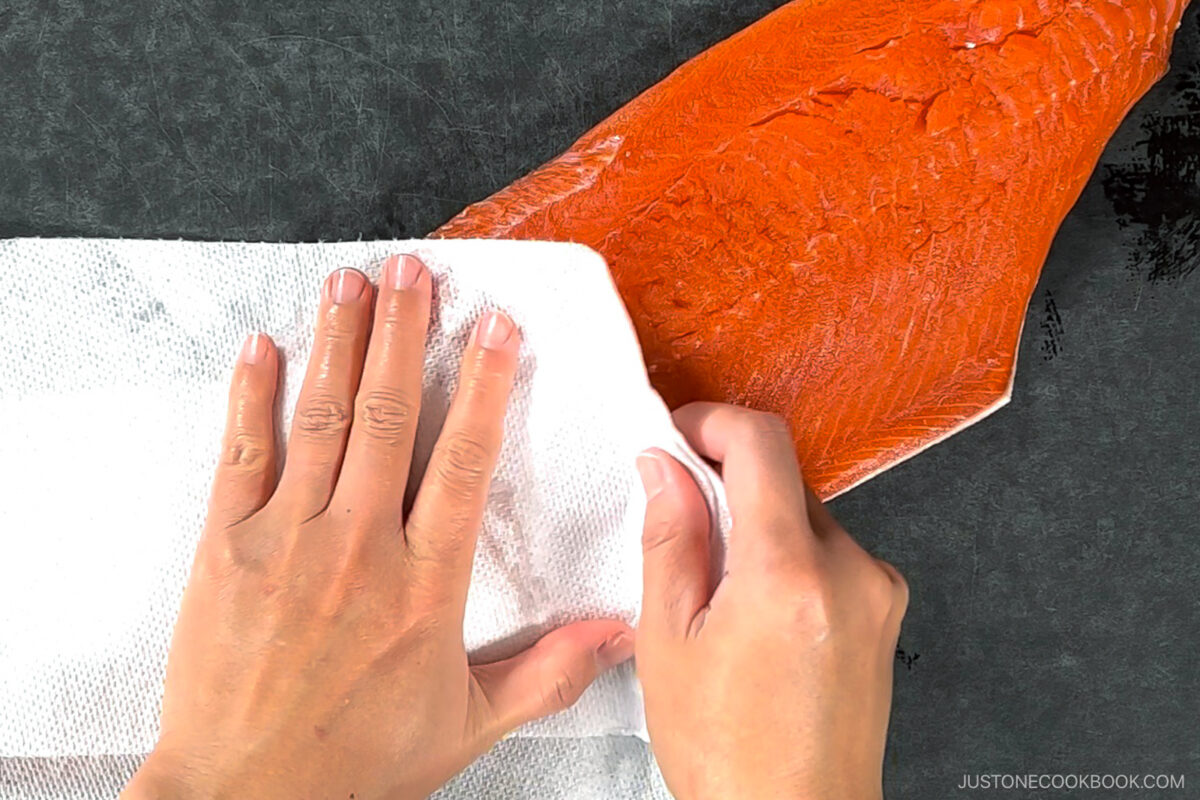
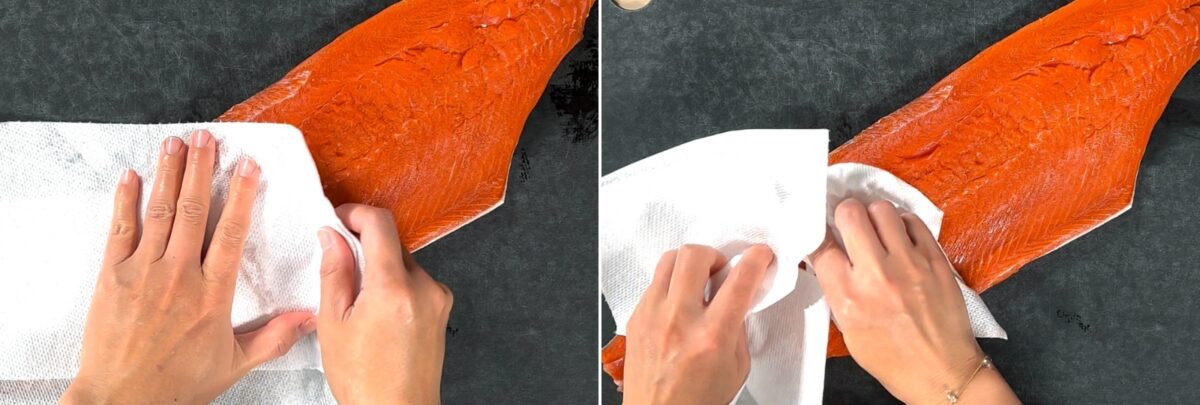
- Pat dry 1 side of salmon with paper towels. Check that the salmon skin does not have scales. Run your fingers along the skin to feel for any remaining scales. Use the flat side of a knife to scrape them off.
- Place the salmon skin side down with the narrow tail end to your left (the head end is wider). Cut off the tail‘s narrowest part, which is too small for Japanese-style fillets. Tilt your knife back about 30 degrees and diagonally slice the salmon toward the tail end.
- Cut the Japanese-style fillets, tilting your knife at a 30-degree angle to make diagonal slices. Slice the fillets to a uniform 1-inch (2.5 cm) thickness so they cook evenly. My one side of salmon yields 8 Japanese-style fillets and 3 additional odd-sized fillets. For sockeye salmon, I recommend making Salted Salmon (Shiozake). For other types of salmon, check out my salmon recipes.
To Store
- Wrap each fillet individually in plastic wrap, removing as much air as possible, then place in a freezer-safe bag or container. Freeze for up to 1 month.
Nutrition
Did you make this recipe?
Tag @justonecookbook on Instagram so we can see your delicious creation!
Editor’s Note: This post was originally published on March 28, 2022, and updated with more helpful information on March 15, 2026.